* perf: system toolset & mcp (#5200)

* feat: support system toolset

* fix: type

* fix: system tool config

* chore: mcptool config migrate

* refactor: mcp toolset

* fix: fe type error

* fix: type error

* fix: show version

* chore: support extract tool's secretInputConfig out of inputs

* chore: compatible with old version mcp

* chore: adjust

* deps: update dependency @fastgpt-skd/plugin

* fix: version

* fix: some bug (#5316)

* chore: compatible with old version mcp

* fix: version

* fix: compatible bug

* fix: mcp object params

* fix: type error

* chore: update test cases

* chore: remove log

* fix: toolset node name

* optimize app logs sort (#5310)

* log keys config modal

* multiple select

* api

* fontsize

* code

* chatid

* fix build

* fix

* fix component

* change name

* log keys config

* fix

* delete unused

* fix

* perf: log code

* perf: send auth code modal enter press

* fix log (#5328)

* perf: mcp toolset comment

* perf: log ui

* remove log (#5347)

* doc

* fix: action

* remove log

* fix: Table Optimization (#5319)

* feat: table test: 1

* feat: table test: 2

* feat: table test: 3

* feat: table test: 4

* feat: table test : 5 把maxSize改回chunkSize

* feat: table test : 6 都删了,只看maxSize

* feat: table test : 7 恢复初始,接下来删除标签功能

* feat: table test : 8 删除标签功能

* feat: table test : 9 删除标签功能成功

* feat: table test : 10 继续调试,修改trainingStates

* feat: table test : 11 修改第一步

* feat: table test : 12 修改第二步

* feat: table test : 13 修改了HtmlTable2Md

* feat: table test : 14 修改表头分块规则

* feat: table test : 15 前面表格分的太细了

* feat: table test : 16 改着改着表头又不加了

* feat: table test : 17 用CUSTOM_SPLIT_SIGN不行,重新改

* feat: table test : 18 表头仍然还会多加,但现在分块搞的合理了终于

* feat: table test : 19 还是需要搞好表头问题,先保存一下调试情况

* feat: table test : 20 调试结束,看一下replace有没有问题,没问题就pr

* feat: table test : 21 先把注释删了

* feat: table test : 21 注释replace都改了,下面切main分支看看情况

* feat: table test : 22 修改旧文件

* feat: table test : 23 修改测试文件

* feat: table test : 24 xlsx表格处理

* feat: table test : 25 刚才没保存先com了

* feat: table test : 26 fix

* feat: table test : 27 先com一版调试

* feat: table test : 28 试试放format2csv里

* feat: table test : 29 xlsx解决

* feat: table test : 30 tablesplit解决

* feat: table test : 31

* feat: table test : 32

* perf: table split

* perf: mcp old version compatibility (#5342)

* fix: system-tool secret inputs

* fix: rewrite runtime node i18n for system tool

* perf: mcp old version compatibility

* fix: splitPluginId

* fix: old mcp toolId

* fix: filter secret key

* feat: support system toolset activation

* chore: remove log

* perf: mcp update

* perf: rewrite toolset

* fix:delete variable id (#5335)

* perf: variable update

* fix: multiple select ui

* perf: model config move to plugin

* fix: var conflit

* perf: variable checker

* Avoid empty number

* update doc time

* fix: test

* fix: mcp object

* update count app

* update count app

---------

Co-authored-by: Finley Ge <32237950+FinleyGe@users.noreply.github.com>
Co-authored-by: heheer <heheer@sealos.io>
Co-authored-by: heheer <zhiyu44@qq.com>
Co-authored-by: colnii <1286949794@qq.com>
Co-authored-by: dreamer6680 <1468683855@qq.com>
fast
这是FastGPT的官方文档,采用fumadoc框架。
获取搜索应用
点击Algolia,进行注册账号,注册成功后需要点击页面的搜索,然后查看应用,默认会有一个应用。
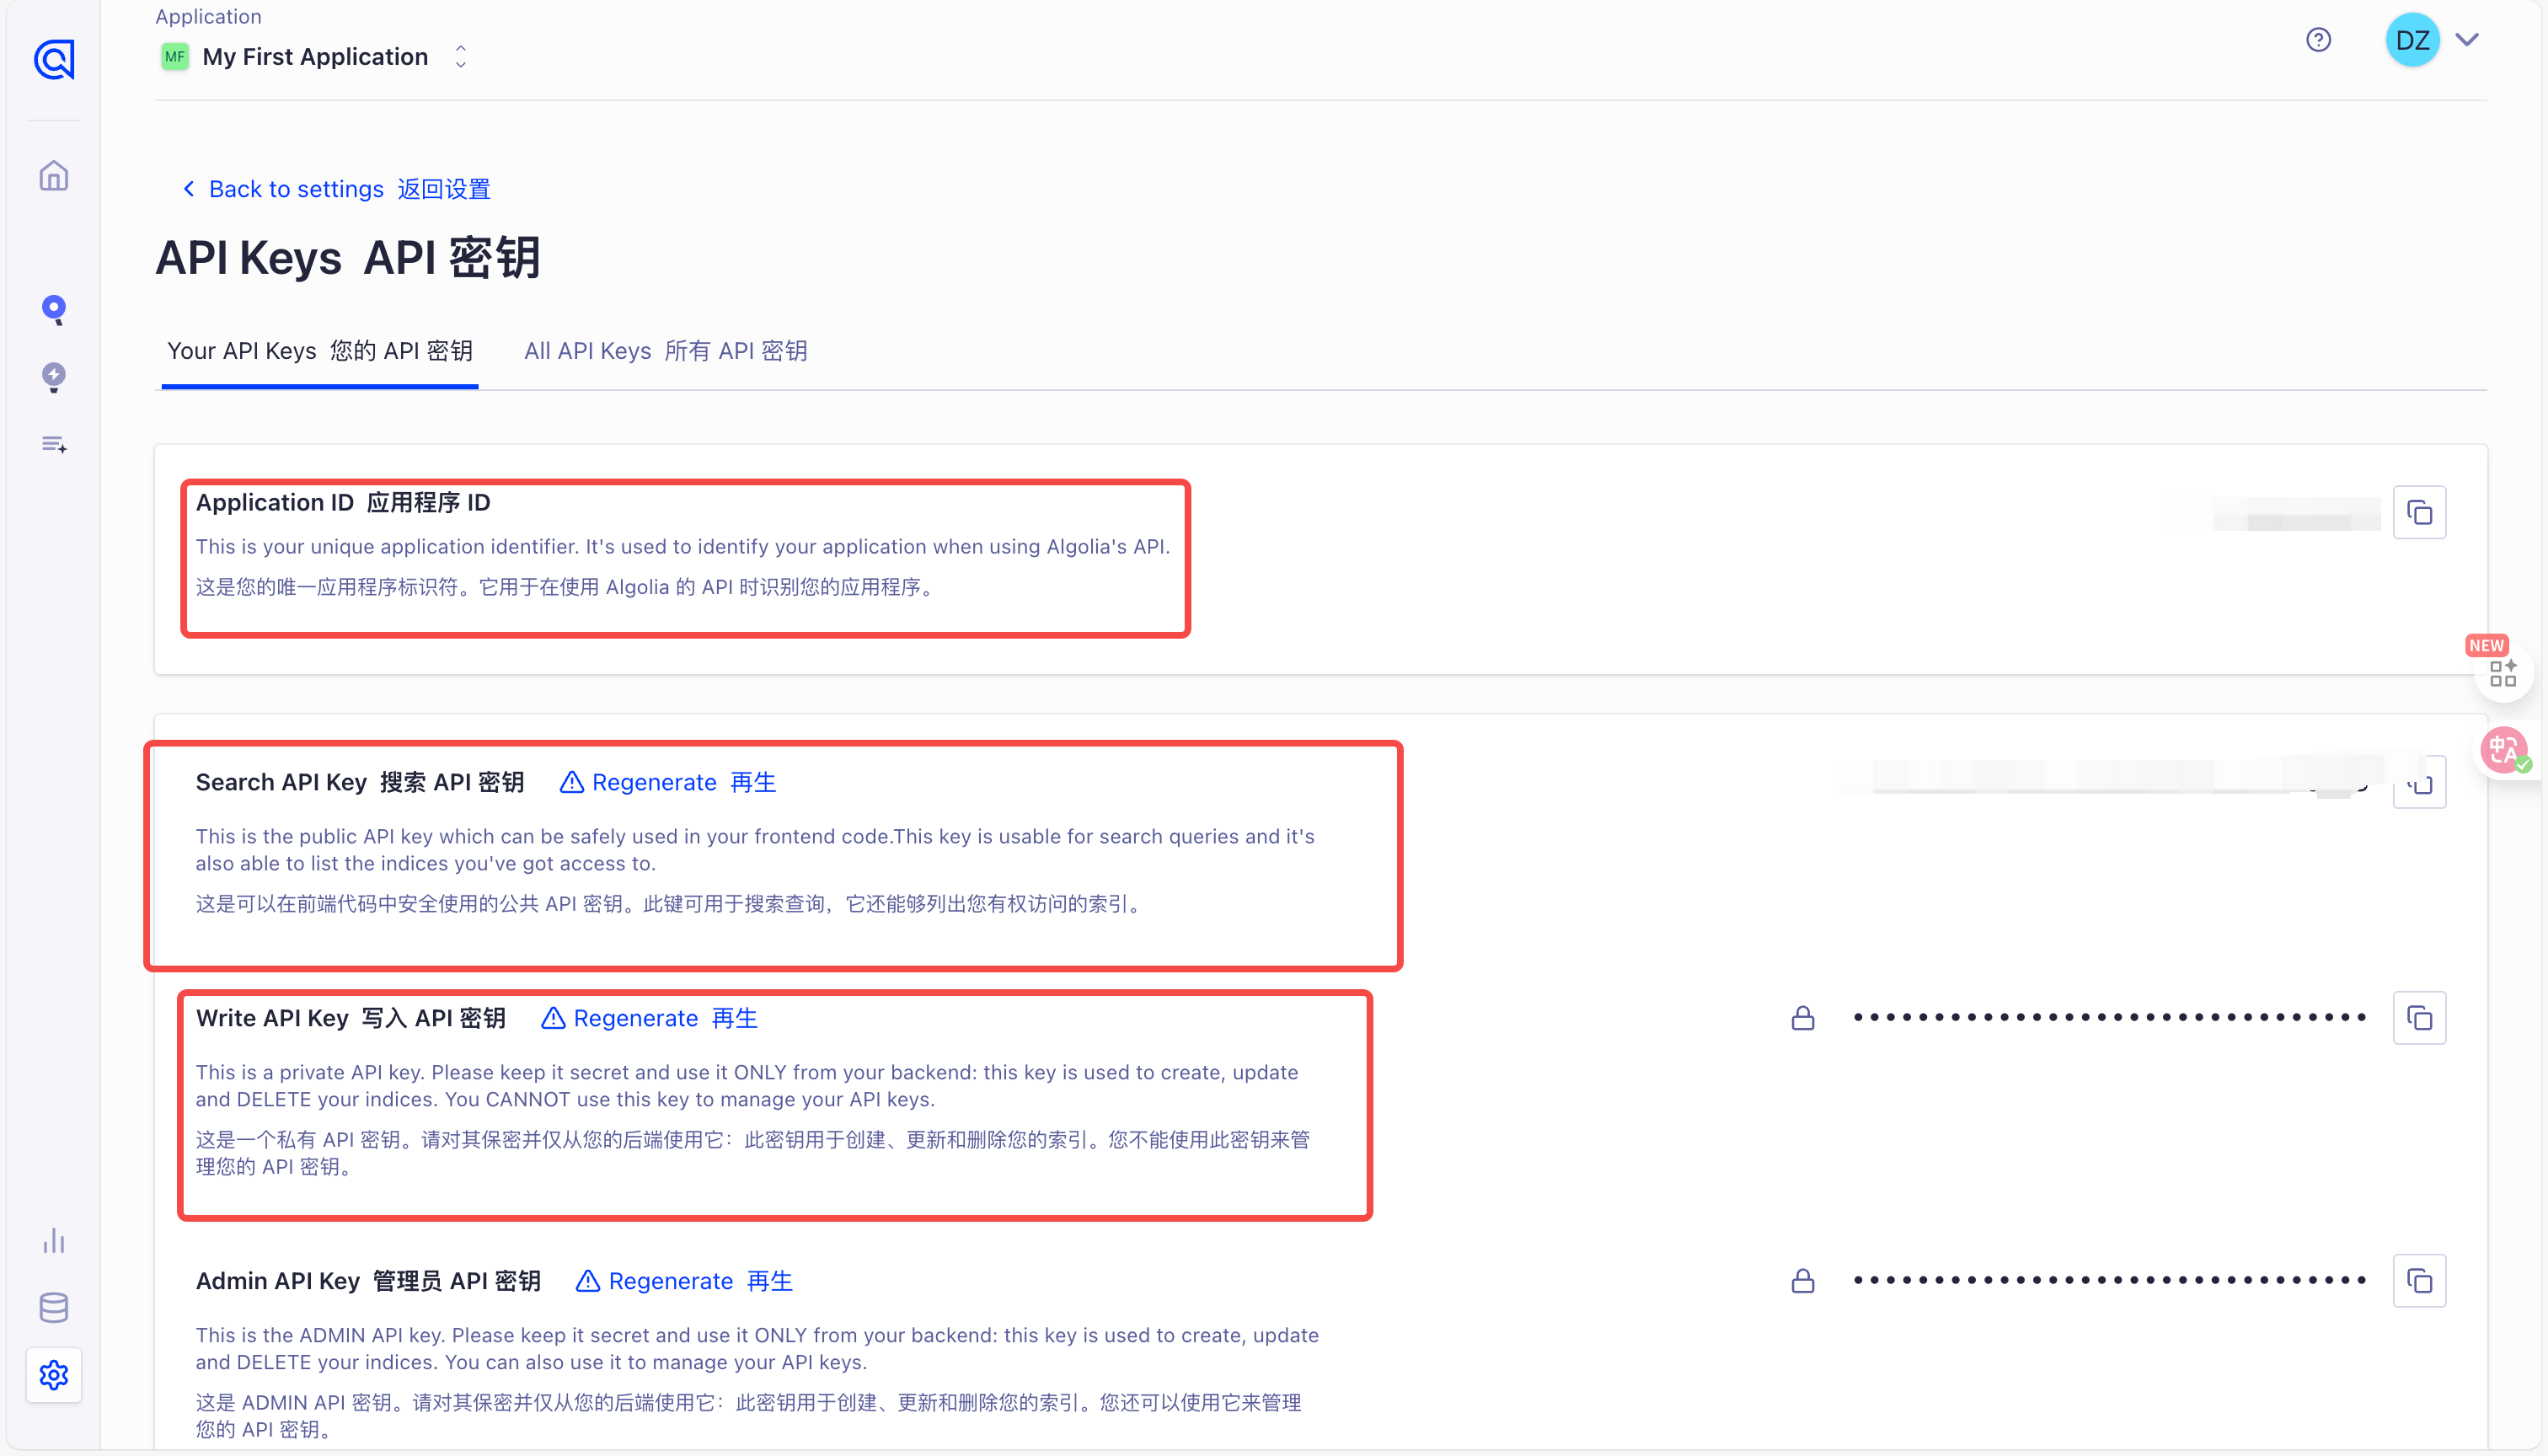
拥有应用后点击个人头像,点击设置,点击API Keys查看自己的应用id和key。
页面中的Application ID和Search API Key,Write API KEY就是环境变量对应的NEXT_PUBLIC_SEARCH_APPID和NEXT_PUBLIC_SEARCH_APPKEY,SEARCH_APPWRITEKEY
运行项目
要运行文档,首先需要进行环境变量配置,在文档的根目录下创建.env.local文件,填写以下环境变量:
SEARCH_APPWRITEKEY =  #这是上面获取的Write api key
NEXT_PUBLIC_SEARCH_APPKEY = #这是上面获取的搜索key
NEXT_PUBLIC_SEARCH_APPID =  #这是上面的搜索id
FASTGPT_HOME_DOMAIN =    #要跳转的FastGPT项目的域名,默认海外版
你可以在FastGPT项目根目录下执行以下命令来运行文档。
npm install #只能npm install,不能pnpm
npm run dev
项目会默认跑在http:localhost:3000端口
书写文档
文档采用mdx格式,大体和md一致,但是现在文档的元数据只支持title description和icon三个字段,参考以下示例代码:
---
title: FastGPT 文档
description: FastGPT 官方文档
icon: menu #icon采用`lucide-react`第三方库。
---

import { Alert } from '@/components/docs/Alert'; #高亮块组件

<Alert icon="🤖" context="success">
快速开始体验
- 海外版:[https://fastgpt.io](https://fastgpt.io)
- 国内版:[https://fastgpt.cn](https://fastgpt.cn)
</Alert>

import {Redirect} from '@/components/docs/Redirect' #重定向组件,如果你希望用户点击这个文件跳转到别的文件的话,详情参考 `FAQ`的`Docker 部署问题`文档。

<Redirect to="/docs/introduction/development/docker/#faq" />

<Tabs items={['Javascript', 'Rust']}> #tabs组件用法,渲染效果参考`introduction`下`development`的`faq`文档
  <Tab value="Javascript">Javascript is weird</Tab>
  <Tab value="Rust">Rust is fast</Tab>


import FastGPTLink from '@/components/docs/linkFastGPT'; #FastGPT跳转链接组件,通过接收一个域名环境变量,来实现跳转到海外或者国内

本文档介绍了如何设置开发环境以构建和测试 <FastGPTLink>FastGPT</FastGPTLink>。
</Tabs>
在书写完文档后,需要在对应的目录下的meta.json文件的pages字段合适位置添加自己的文件名。例如在content/docs(默认这是所有文档的根目录)的introduction目录下书写了一个hello.mdx文件。则需要去introduction目录下的meta.json添加以下内容:
{
  "title": "FastGPT Docs",
  "root": true,
  "pages": ["[Handshake][联系我们](https://fael3z0zfze.feishu.cn/share/base/form/shrcnjJWtKqjOI9NbQTzhNyzljc)","index","guide","development","FAQ","shopping_cart","community","hello"], #"hello"原本没有,此外,这里的顺序就是最后文档的展示顺序,现在"hello"文档将会在`introduction`的最后展示
  "order": 1
}
i18n
在content/docs下的所有.mdx文件为默认语言文件(当前默认语言中文),.en.mdx文件为i18n支持的英文文件,例如,你可以将hello.mdx文档翻译后,写一个hello.en.mdx,同时,在对应目录的meta.en.json的"pages"字段写下对应的文件名来支持英文文档。
ps
meta.json的"pages"中的"[Handshake][联系我们](https://fael3z0zfze.feishu.cn/share/base/form/shrcnjJWtKqjOI9NbQTzhNyzljc)"这个字段是目录的链接形式,表现效果为,点击后跳转到对应的url。
最后,如果依然有问题,可以进入https://fumadocs.dev/docs/ui官网,询问官网提供的ai来了解文档框架的使用。


